Signs your ceiling panel needs replacement
Four conditions point to panel replacement rather than just resealing the source. Catch any of these and the laminate hasn't gone too far yet.
1. Brown rings around a vent or AC
Water has reached the Lauan ceiling panel and stained through. Pull the panel, dry the cavity, and replace - $485-$985 depending on size.
2. Soft or sagging area overhead
Lauan substrate has softened from chronic moisture. Pressing up gives way. Panel is past saving - replace and inspect joist for rot.
3. Musty smell around the ceiling
Insulation behind the panel has held moisture and started growing mold. Pull, bag, fog, and replace insulation plus panel.
4. Visible delamination or peeling
Panel surface is bubbling away from the substrate. Often around skylight perimeters. Full replacement plus source-leak reseal.
Ceiling panel replacement pricing
| Service | Parts / Brand | On-Site Time | Flat-Rate Range |
|---|---|---|---|
| Vent-area panel patch (under 4 sq ft) | Lauan / vinyl-faced | 3-4 hours | $385 - $585 |
| Standard panel replacement (4-8 sq ft) | Lauan / vinyl-faced | 4-6 hours | $485 - $985 |
| Full ceiling section (over 8 sq ft) | Lauan / vinyl-faced | 6-10 hours | $985 - $1,950 |
| Joist sister-up (per location) | Marine ply / Coosa | 2-3 hours | $245 - $485 |
| Insulation replacement (cavity) | Fiberglass batt / foam | 1-2 hours | $185 - $345 |
| Source-leak reseal (vent / skylight) | Dicor 501LSW / butyl | 1-2 hours | $185 - $345 |
| Trim and lighting reinstall | OEM trim / fixtures | 1-2 hours | $165 - $245 |
Brands and materials we use
- OEM-match Lauan ceiling panels in standard 4x8 sheets
- Vinyl-faced Lauan for areas where moisture resistance matters
- Coosa Composites for joist sister-up where ground contact threatens
- Marine plywood for structural patches
- Dicor 501LSW lap sealant for vent and skylight reseal
- Camco butyl tape under flanges
- Concrobium for cavity treatment if mold is present
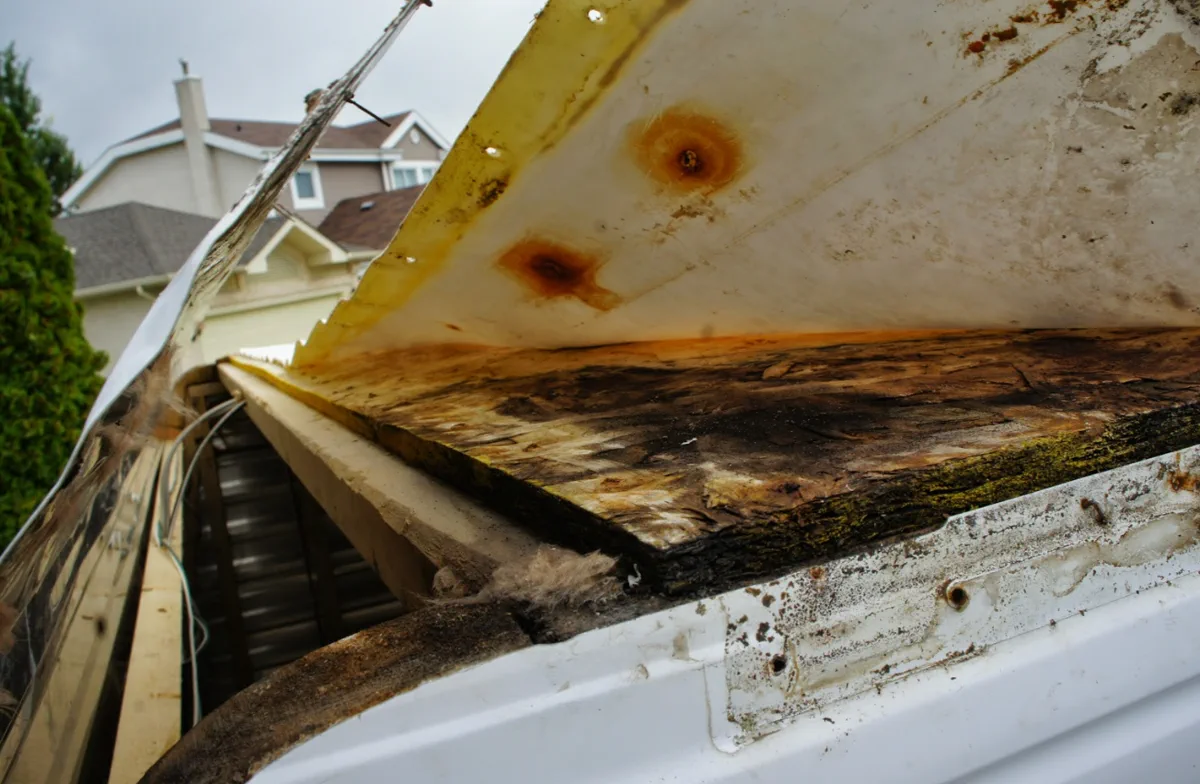
How do I know my RV ceiling panels are water damaged and need replacement?
Water damage shows itself fast - soft spots, discoloration, or peeling laminate mean your ceiling panels are done. The substrate (usually plywood or fiberglass composite) absorbs moisture and loses structural integrity. You'll feel sponginess when you press overhead, or see brown stains spreading across the panel.
In a 2022 Grand Design Reflection, we recently found delamination across the entire bedroom ceiling from a slow Atwood water heater leak - the panel had been wicking moisture for months. Temperature swings and humidity cycles speed up the damage.
Once panels start separating, mold colonizes the gap. It's not cosmetic - a soft ceiling panel can fail and drop, especially over a sleeping area or dinette.
A Forest River Sunseeker owner met us at his Vero Beach driveway with visible sagging above the kitchen. The Dicor roof sealant around a vent had cracked, and water was running down the interior wall cavity directly onto the ceiling substrate.
Within 48 hours, the particleboard core turned to mush. We replaced the entire kitchen ceiling panel, re-sealed the vent with fresh Dicor, and confirmed the leak was dead. That's the real scenario - one small roof failure cascades into panel replacement if you wait too long.
Signs your ceiling panel needs replacement:
- Soft spots or sponginess when you press overhead
- Brown, tan, or black discoloration or staining
- Visible peeling, bubbling, or laminate separation
- Musty or moldy odor near the ceiling
- Sagging or drooping sections
- Water dripping or visible moisture between panels and roof
- Creaking or movement when you touch the panel


What is the actual repair process for replacing a damaged ceiling panel?
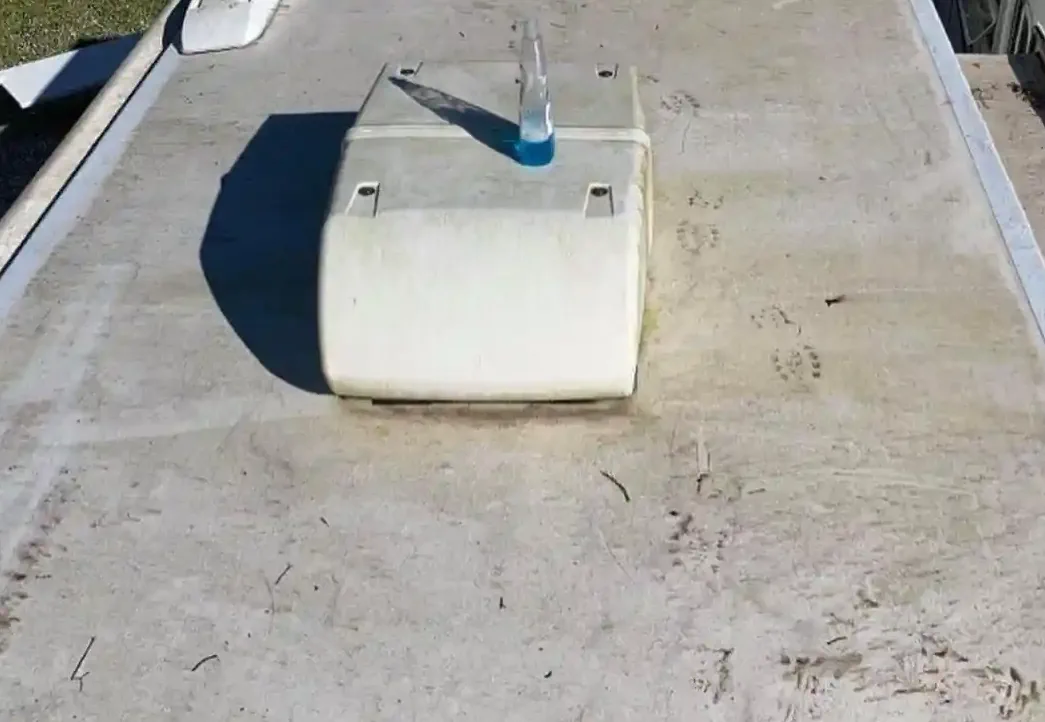
Our process is: find the leak source, remove the old panel, prep the frame, install a new panel, and seal everything watertight. We don't just slap on a new panel and call it done - that's how you end up back here in six months. Step one is leak identification.
We use moisture meters and visual inspection to trace the water entry point (usually roof sealant, a roof vent, or a slide-out seal in a Lippert Schwintek mechanism). We photograph the source and fix it before we install anything.
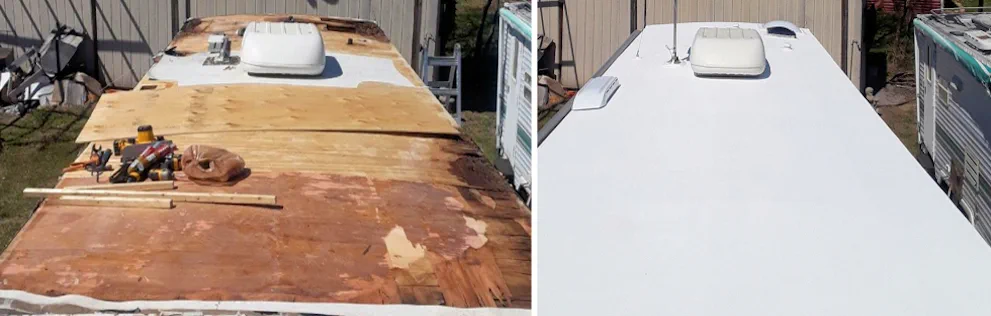
Then we safely remove the damaged panel by unbolting it from the frame and carefully disconnecting any wiring, light fixtures, or vents attached to it. We inspect the frame for rot or mold and treat or replace compromised wood.
New panel goes in - we source OEM stock when available, or premium aftermarket plywood-core or fiberglass panels. We re-seal all edges with appropriate sealant (Dicor or Eternabond), reconnect lighting and venting, and pressure-test the area.
A Jayco owner in Boise hit us with a slide-out ceiling that was detaching. The Lippert leveling mechanism above it had vibrated and cracked the Dicor seal where the roof met the wall.
We traced it, sealed the leveling housing with fresh sealant, removed the sagging 4x8 panel, confirmed no mold in the frame, and installed a new marine-grade panel. Total time: 3.5 hours.
The owner was back on the road that evening. That's the difference between a mobile shop like us and waiting weeks at a dealer.
What we do in the process:
- Moisture meter testing to pinpoint leak origin
- Visual roof and seal inspection from inside and out
- Safe panel removal without frame damage
- Frame inspection and mold treatment if needed
- New panel installation with proper fastening
- Edge sealing with Dicor or equivalent sealant
- Electrical and vent reconnection
- Pressure testing and final inspection
What does a ceiling panel replacement actually cost?
Ceiling panel replacement runs $400-$1,200 depending on panel size, location, and whether the frame needs repair. A small 2x3 bathroom panel in a Winnebago is often $450-$600 all-in. A full 4x8 bedroom or galley panel in a larger coach (like a Tiffin Phaeton or Coachmen Apex) hits $900-$1,200.
Pricing includes labor, the new panel, sealant, and fasteners. The leak source fix is separate - if you need a Dicor roof seal refresh, that's another $150-$300.
If the frame has rot and needs wood replacement, add $200-$400. We quote flat-rate by phone after you describe the panel location and condition - no surprises at the end. We don't charge differently in Florida versus Idaho; pricing is consistent nationwide through our partner network.
A customer called with a 2019 Keystone Residence ceiling panel soft spot over the living area. We quoted $650 for panel replacement, leak fix, and sealing.
They asked if waiting three months would be cheaper - it won't. Waiting means the damage spreads, mold spores colonize the cavity, and you risk the structural frame failing.
We got them in the next day. A month later, they texted that they were glad they didn't put it off - their friend had waited on a similar issue and ended up needing frame reconstruction, which cost $2,100.
What affects your final cost:
- Panel size (small vs. full-width sections)
- Panel material (plywood-core or marine fiberglass composite)
- Leak source repair (roof seal, vent flashing, slide-out seal)
- Frame rot or wood replacement needed
- Mold remediation beyond surface cleaning
- Electrical fixture or vent relocation
- Regional mobility premium (if outside your nearest covered metro)
What brands and parts do you use for ceiling panel replacement?
We source OEM panels when available, or marine-grade replacement stock from suppliers like Lippert, Schwintek, and independent panel manufacturers. We don't use hardware-store plywood - RV ceiling panels are engineered for weight, moisture resistance, and flamability compliance. OEM is the gold standard: if we can get a Factory Direct or Lippert panel that matches your Dometic AC mounting or your Schwintek slide-out cutout, we do that.
When OEM is obsolete or backordered (common on 10+ year old rigs), we source quality aftermarket composite or marine plywood with the same dimensions and fastening pattern. Sealants are always Dicor or Eternabond - we don't use caulk-gun silicone because it hardens, cracks, and lets water back in. All fasteners are stainless or plated to resist corrosion in the RV environment.
We serviced a 2008 Coachmen that needed bedroom ceiling replacement. Coachmen stopped making that exact panel in 2015, so OEM was gone.
We found a Lippert equivalent with the same footprint and fastener pattern, installed it with Dicor Pro, and it integrated seamlessly. Owner saved $200 versus tracking down salvage.
That's the difference between knowing the supplier network and guessing. We've handled panels across Forest River, Jayco, Winnebago, Tiffin, Grand Design, Keystone - we know what works and what doesn't.
Panels and materials we source:
- OEM panels from Lippert, Schwintek, manufacturer stock when available
- Marine-grade plywood-core ceiling panels
- Fiberglass composite panels for high-humidity areas
- Dicor and Eternabond sealants for permanent waterproof sealing
- Stainless and plated fasteners rated for RV use
- Replacement lighting fixtures and vent adapters as needed
- Mold-resistant substrate and treatment compounds
How long does ceiling panel replacement take, and can you come today?
A single ceiling panel replacement takes 2-4 hours on-site, depending on access and whether we need to fix the leak source first. A straightforward panel swap - remove old, install new, seal, reconnect lights - is 2 to 2.5 hours. Add time if the leak source is complex (roof vent resealing, slide-out seal work) or if frame rot requires treatment.
Our emergency response in our covered metros core areas is 2-4 hours from call time. We're mobile, so we come to you - no waiting in a dealer service lane for an appointment three weeks out.
We schedule calls in the order they come, and we can often fit same-day or next-day jobs if you're in Port St. Lucie, Stuart, Vero Beach, Boise, Meridian, or surrounding areas. Outside those zones, our nationwide partner network handles the work at comparable speed and quality.
A Jayco owner called Monday morning with ceiling softness over the master bed. They were leaving Thursday for a family trip.
We came out Tuesday, identified a Dicor roof seal failure over the bedroom vent, replaced the panel and resealed the vent Wednesday. They left Thursday with a fresh, dry ceiling and peace of mind.
A dealer would have said six to eight weeks - they were booked solid. That's the real difference between mobile and shop-based. We work around your schedule, not our waiting list.
Timing factors:
- Panel access and fastener removal (30-45 minutes)
- Leak source diagnosis and repair (30-90 minutes if concurrent)
- Old panel removal and frame inspection (20-30 minutes)
- New panel fitting, fastening, and sealing (45-60 minutes)
- Electrical and vent reconnection (15-30 minutes)
- Testing, cleanup, and final walkthrough (15-20 minutes)
What warranty do you offer on ceiling panel replacement work?
We back all ceiling panel replacement work with a 90-day workmanship warranty - the panel stays dry, the seals hold, and no water intrusion occurs during that period. That means if we install a panel, seal it, and water gets in behind our work within 90 days, we fix it for free. The warranty covers labor and materials for reseal or panel replacement.
What it doesn't cover is new water damage from a different source (like a roof leak two feet away) or damage from misuse or impact. It also assumes normal RV use - if you park under a tree and a branch punches through, that's on you.
We provide a written receipt with warranty terms. After 90 days, you own the repair, but our work is solid - we see repeat customers because our panels stay dry.
A Grand Design owner had us replace a galley ceiling panel in February. In April, they called because water was appearing again - but it was coming from a different vent on the other side of the coach.
Our 90-day warranty didn't cover that (it was a separate leak source), but we charged them only labor to fix the second issue because they trusted us on the first. They became a regular customer for follow-up maintenance. That's the owner-operator approach - we stand behind our work, and we're honest about what we're responsible for.
What the warranty covers and doesn't:
- No water intrusion behind the panel for 90 days from installation
- Free reseal or panel replacement if our work fails
- Faulty fasteners or sealant defects within 90 days
- Normal wear, weathering, and UV exposure after 90 days
- Water from unrelated sources or new roof damage
- Impact damage, punctures, or owner-inflicted harm
- Age-related failures of original frame wood beyond our control