RV gutters are deceptively important. Most owners don't think about them until water starts streaming down the side of the rig and into a slide-out seam, then they realize the drip-rail has been quietly funneling rain into a wall cavity for months.
Florida thunderstorm season hits gutters hard - the volume of water in a 30-minute downpour overwhelms a clogged downspout fast. Idaho freeze-thaw cycles work the joints loose every winter. We carry Dicor 501LSW lap sealant, ProFlex RV polymer, replacement gutter sections in common profiles, end caps, downspout outlets, and stainless backing plates on every truck so most calls finish same-day.
Signs your RV gutter needs service
Four patterns drive almost every gutter call we run. Catch any of these now and a $185 reseal becomes the fix - wait six months and you're looking at a sidewall delamination repair.
1. Water sheeting down the sidewall
Rain runs down the side of the rig instead of out the downspout. Either the gutter is clogged, the slope has shifted, or a joint has separated. Reseal or clear, $145-$285.
2. Visible gap at a joint or end cap
You can see daylight where two gutter sections meet, or where the end cap has pulled away. Joint reseal with Dicor 501LSW, $145-$245 per location.
3. Pooling water on the roof edge
Water sits along the gutter line instead of draining. The rail has lost its slope or the downspout is plugged. Re-bed and clear, $185-$345.
4. Bent or torn section after a strike
Tree branch or low overhang took out a length of gutter. Section replacement runs $245-$485 depending on profile match and length.
RV gutter repair pricing
| Repair | Parts / Brand | On-Site Time | Flat-Rate Range |
|---|---|---|---|
| Joint reseal (per location) | Dicor 501LSW / ProFlex RV | 30-45 min | $145 - $245 |
| Downspout clearing + flush | Auger / water test | 30-45 min | $145 - $185 |
| End-cap replacement | OEM end cap / Dicor | 30-45 min | $145 - $245 |
| Drip-rail full reseal | Dicor 501LSW | 2-3 hours | $385 - $585 |
| Section replacement (under 4 ft) | OEM-match aluminum / vinyl | 2-3 hours | $385 - $585 |
| Section replacement (4-8 ft) | OEM-match aluminum / vinyl | 3-4 hours | $585 - $985 |
| Hardware re-fasten + backing plates | Stainless screws / backing plates | 1-2 hours | $185 - $345 |
Brands and materials we use on gutter calls
- Dicor - 501LSW lap sealant for horizontal joints, 551 non-sag for vertical
- Geocel - ProFlex RV polymer sealant for end-cap and downspout perimeters
- Camco - butyl tape for under-gutter rebed when pulling sections
- Eternabond - Roofseal tape for emergency joint stabilization
- OEM-match - aluminum or vinyl gutter profile in standard RV widths
- Stainless hardware and backing plates for re-fasten work

Why Your RV Gutter System Needs Professional Repair
Your RV's gutter system faces unique challenges that regular home gutters never encounter. Road vibrations, constant movement, and temperature extremes create stress points that lead to separation, cracking, and failure.
A residential gutter sits on a stationary structure with a fixed pitch and never moves. An RV gutter has to survive highway vibration, thermal cycling from sub-freezing nights to summer roof temps above 150°F, and the constant flexing of a body that shifts over every bump and turn.
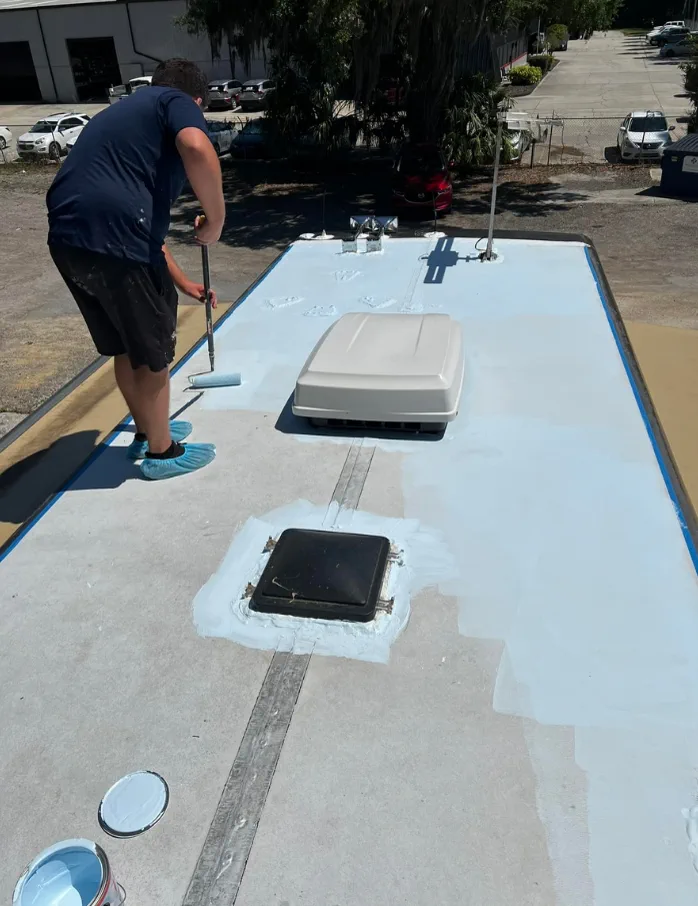
That movement is what drives the design differences. RV gutters are lighter, use mounting brackets that allow a small amount of flex rather than rigid fastening, and seal against EPDM, TPO, or fiberglass membranes instead of wood fascia. The sealants matter too - standard silicone or latex caulk breaks down fast under UV and road vibration, so RV-specific self-leveling lap sealants are used at every joint and termination point.
Warning signs we look for during a gutter inspection:
- Brown rings on ceiling panels mean water has been migrating for weeks - catch it now or rip the laminate later.
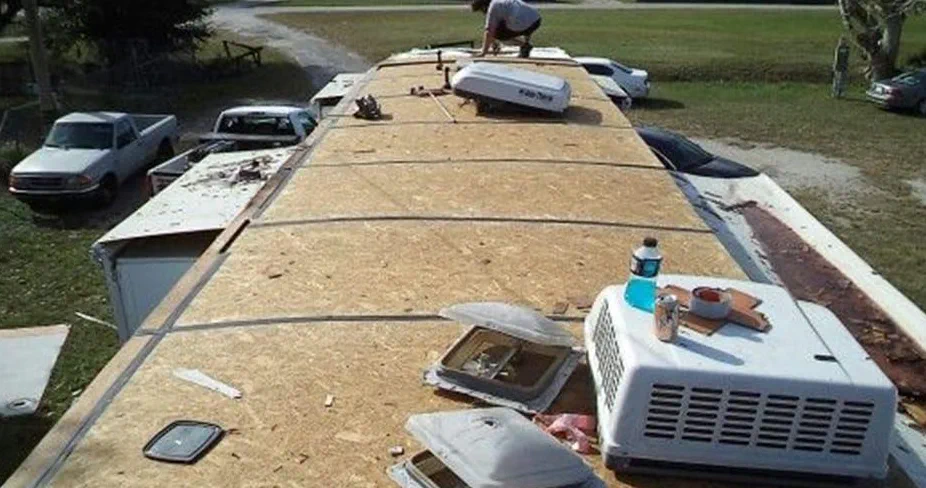
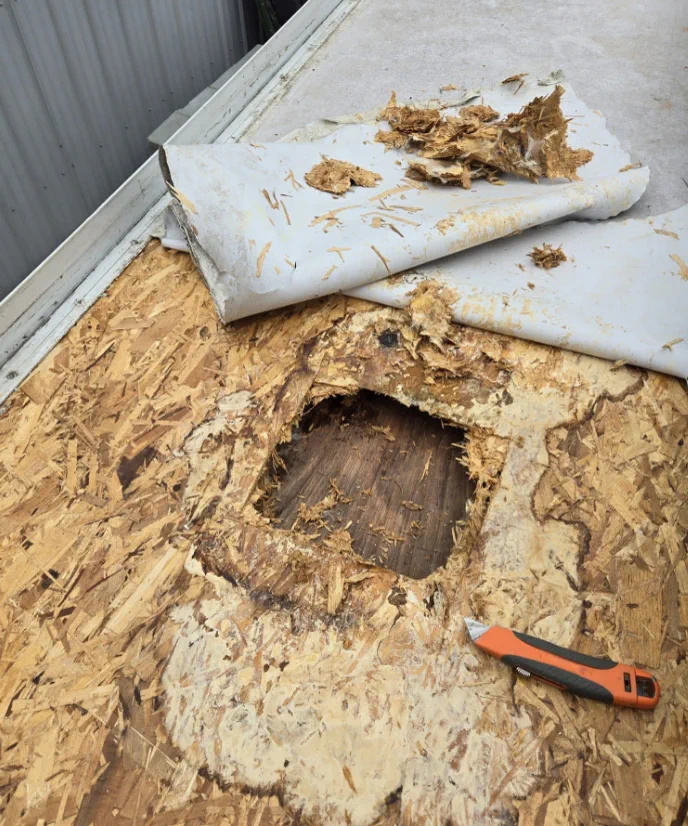
- Sub-roof rot. The plywood under the membrane has soaked through. Inspect immediately - patching over wet decking is a callback waiting to happen.
- Sidewall delamination near the gutter line - water has tracked down the laminate and lifted the fiberglass skin.
Common RV Gutter Problems We Fix
RV gutters experience several common failure modes that our technicians address daily. Separation at joints represents the most frequent issue, especially where gutters connect to spouts and corners. These separations occur due to thermal expansion, road vibration, and natural settling of the RV structure over time.
Clogged downspouts create another major problem, particularly for RVs stored under trees or in dusty environments. However, the issue goes beyond simple debris removal.
We often find that clogs cause water backup, which then leads to gutter overflow and potential roof membrane damage. In addition, standing water in clogged gutters can freeze and expand, cracking the gutter material itself.
Impact damage from low branches or hail affects many RVs, especially those that travel through heavily wooded areas. And bent or dented sections don’t just look bad – they disrupt proper water flow and create low spots where debris accumulates. Our rv gutter repair process addresses both the immediate damage and the underlying drainage issues it creates.
Our Professional RV Gutter Repair Process
Our systematic approach to RV gutter repair ensures lasting results and prevents future problems. We start with a thorough inspection of the entire gutter system, including connections to the roof, sidewall transitions, downspout outlets, and end caps.
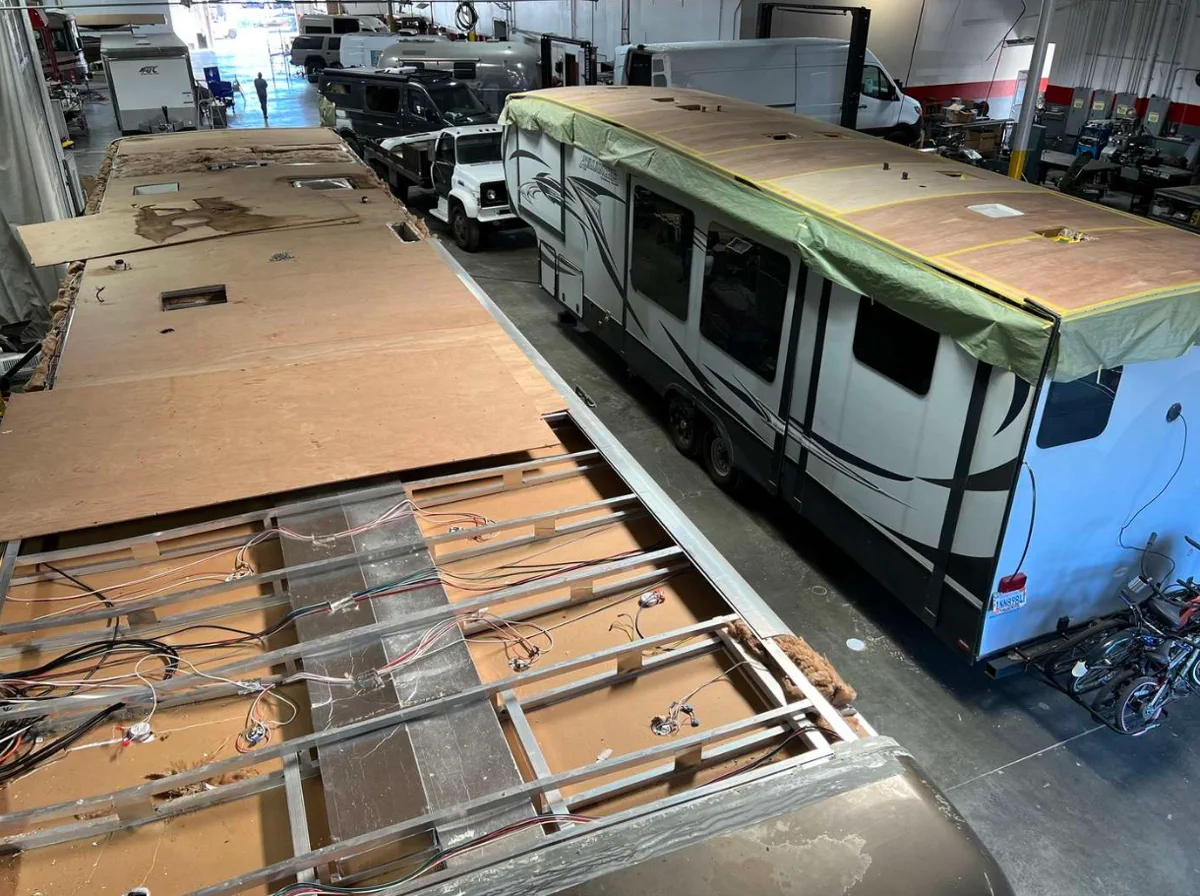
We run water through the system in stages to find slow drainage and pooling. We probe the underlying substrate at any soft-feeling joint to confirm whether sealing alone is enough or whether the rail needs to come down for a deeper repair. After resealing, we run a final water test before signing off.
Materials and Techniques for Lasting RV Gutter Repairs
Successful rv gutter repair depends on using the right materials for mobile applications. Standard home gutter repair products simply don’t work on RVs because they can’t handle constant movement and vibration. We use specialized RV sealants like Dicor or Geocel that maintain flexibility while providing waterproof seals.
Gutter sections themselves require careful matching to original specifications. Most RV manufacturers use lightweight aluminum or vinyl systems designed for specific mounting configurations. Therefore, we maintain inventory of common gutter profiles and can fabricate custom sections when needed for older or specialty RVs.
The mounting system often needs attention during repairs, as original hardware may have loosened or corroded over time. We replace fasteners with stainless steel or coated options that resist corrosion and maintain holding power through thermal cycling. Additionally, we often upgrade mounting points with backing plates to distribute loads better and prevent future pull-through failures.