Why Your RV Camera Mount Keeps Failing
RV camera mounts fail because the roof is a brutal environment. UV, salt spray, vibration, and water penetration destroy cheap plastic brackets and corroded fasteners. Most mounts come from the factory with undersized hardware or are installed straight into fiberglass without proper backing plates.
We've pulled apart camera setups on 47 Winnebago and Jayco units in the last year alone where the bracket had already shifted 3 inches from its original position. The cable either hangs loose (catching wind and water) or gets pinched under the bracket (shorting the camera within months). Progressive corrosion at the fastener head is the silent killer - water wicks into the fiberglass, and by month four you've got a soft spot in the roof.
We recently serviced a 2019 Forest River Georgetown where the owner had a backup camera mounted on the rear cap. The original bracket was held by two self-tapping screws into the fiberglass shell with no washers.
Water had seeped in, the fiberglass was spongey, and the camera image kept cutting out. We removed it, drilled out the damaged section, installed a solid aluminum backing plate with stainless fasteners, sealed the penetration with Dicor sealant, and remounted with a marine-grade bracket.
The signal stabilized and hasn't dropped since. That's the difference between a quick job and a permanent fix.
What kills RV camera mounts:
- Undersized fasteners without washers or backing plates
- Sagging cables catching wind and water spray
- Corrosion at the fastener head from salt and UV
- Fiberglass softening from water infiltration
- Vibration from road travel loosening bolts gradually
- Cable pinches cutting through insulation
What We Do When We Install or Replace Your Mount
We treat the roof penetration like a structural repair, not a drill-and-bolt job. Step one is inspecting the existing fastener holes and fiberglass around them - we use a moisture meter to check for saturation. If the fiberglass is compromised, we cut out the soft section, fill it with epoxy putty, and let it cure per spec.
Then we install a solid aluminum or stainless backing plate on the underside (either through the roof cavity or from inside if we can access it) so the fasteners compress against real structure, not just fiberglass skin. We use stainless hardware - never steel - and oversized washers to spread the load.
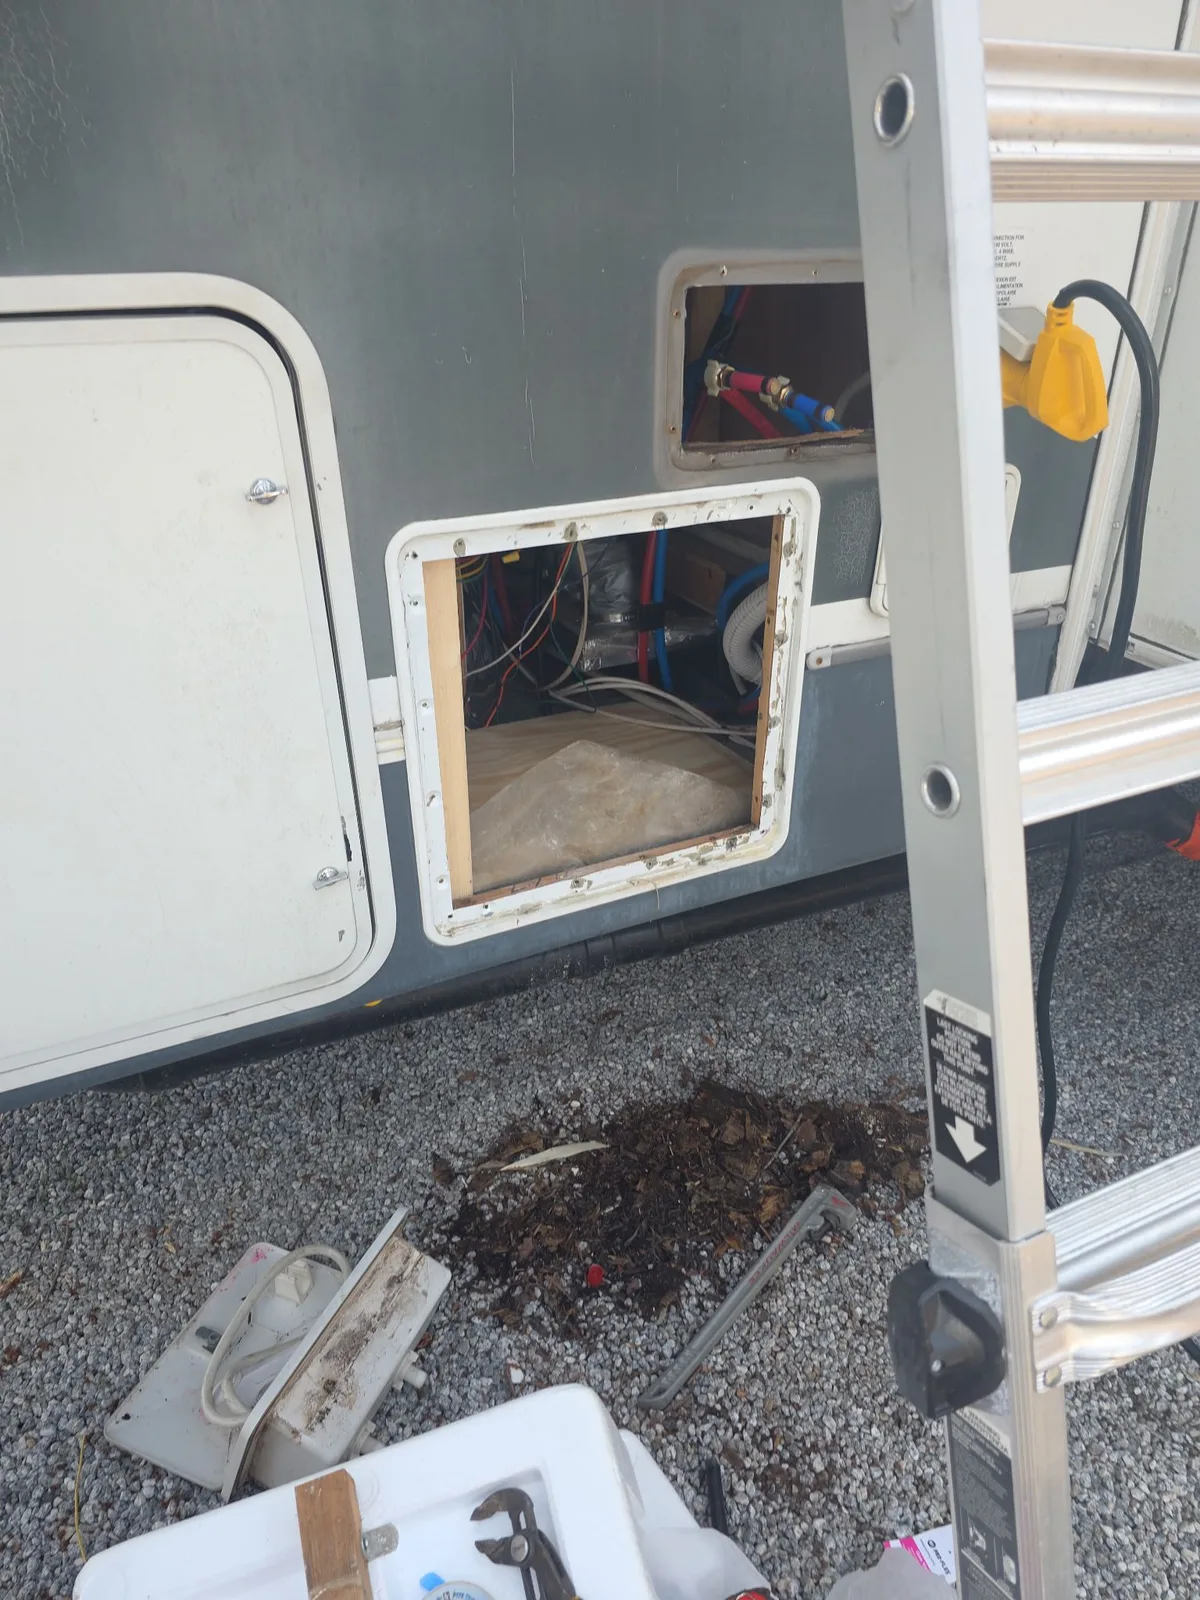
The bracket itself gets mounted with a 100% waterproof seal using Dicor or equivalent marine sealant. Cable runs are routed in split loom, secured every 18 inches, and terminated at a panel-mount connector inside the RV so you can disconnect the camera without cutting anything.
A 2021 Tiffin Allegro owner in Tampa called because his new CMOS backup camera kept fogging up internally - not a mount issue, but moisture was getting in because the cable entry wasn't sealed. We replumbed the entire run, sealed the roof penetration properly, added a drip loop in the cable so water runs off before it reaches the connector, and installed a weatherproof connector box inside the bay.
Three months later, zero fogging. The camera signal is clean. That's because the mount isn't just about bolting hardware to the roof - it's about stopping water from following the cable inside your rig.
Our installation process:
- Inspect fiberglass and fastener holes with moisture meter
- Repair soft spots with epoxy or removal and backing plate
- Install stainless fasteners with oversize washers and backing plate
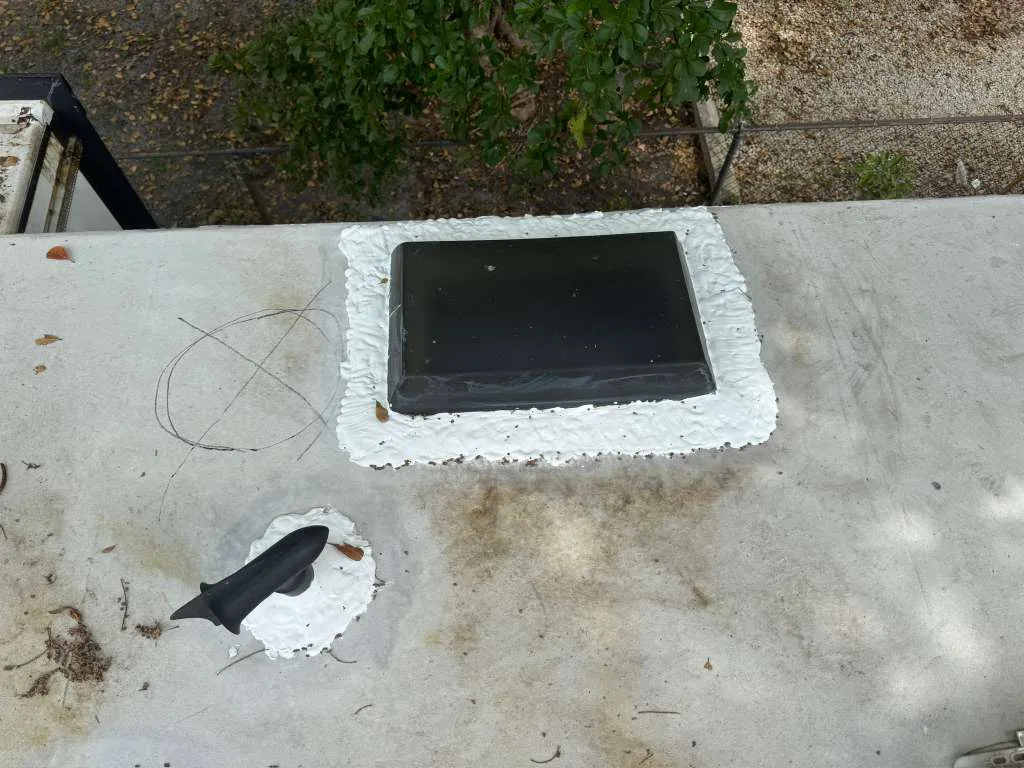
- Seal penetration with Dicor marine-grade sealant
- Route and secure cable in split loom every 18 inches
- Terminate cable at weatherproof interior connector
- Test video signal and mounting stability under load
How Much Does a Security Camera Mount Cost
Pricing depends on camera type, roof condition, and cable distance. A straightforward rear backup camera mount on a sound roof runs $280 - $350. A full-perimeter multi-camera setup (front, sides, rear) with one cable run is $480 - $680.
If we find soft fiberglass and have to repair the roof section first, add $150 - $250. If your cable has to travel 35+ feet inside the RV to reach the monitor (like on a large diesel pusher), add $60 - $100 for extra loom, connectors, and labor.
We quote flat-rate by phone once we know the camera model, mount location, and whether the roof is damaged. No surprises.
No hourly labor tacked on. We serve Winnebago, Jayco, Coachmen, Keystone, and Grand Design units across our nationwide network, and our partner network covers most of the continental US if you need work done out of state.
A Grand Design Solitude owner in Boise had three cameras (front, driver-side, rear) already installed but the mounts were loose and the cables were rubbing through their outer jacket in the baggage bay. We quoted $520 total - $80 per camera bracket refastening with backing plates and sealant, plus $100 for re-routing and protecting the cable runs.
Total time was two and a half hours on-site. The owner had expected a dealer quote to be double that and a month wait. We were there in 36 hours and done the next morning.
Price factors we assess by phone:
- Camera type and mounting location (rear cap, front, side)
- Roof condition (sound fiberglass or soft/damaged sections)
- Cable distance inside the RV (short runs vs. 40+ feet)
- Single camera or multi-camera perimeter setup
- Existing mount reuse or full replacement
- Interior connector type (flush-mount or weatherproof box)
Common Parts We Use and Why They Matter
We don't cheap out on fasteners or sealants because your roof doesn't get a second chance. Stainless 316 bolts, not 304 or steel, cost a few dollars more but don't corrode in salt air. Dicor or Sikaflex marine-grade sealant costs more than caulk but doesn't shrink or crack in UV and stays flexible when the RV flexes.
Aluminum backing plates distribute load across fiberglass instead of point-loading through a single fastener. Weatherproof panel-mount connectors (like RV-C style or M12 industrial types) cost $35 - $60 each but stop water from wicking into the camera wiring. We also carry camera-specific brackets from Lippert and Carefree because they're engineered for RV roof conditions - the holes are pre-drilled, the sealant channels are built in, and they accept standard fasteners without improvisation.
On a 2020 Winnebago Navion, the owner had installed a cheap rear camera mount from a big-box retailer. The plastic bracket cracked after one winter in Idaho, fasteners were zinc-plated (already showing rust), and there was no backing plate.
Water had been sitting in the roof cavity for months. We pulled it, found three inches of soft fiberglass, cut it out, filled it with West System epoxy putty, installed a marine-grade aluminum backing plate, used 316 stainless hardware, sealed with Dicor, and mounted a Lippert-spec bracket.
Cost was $380 installed. The original mount was $40 and had already cost him a soft roof. Real parts win.
What we specify:
- Stainless 316 fasteners with marine-grade washers
- Aluminum or stainless backing plates for load distribution
- Dicor or Sikaflex marine sealant (UV and water resistant)
- Weatherproof panel connectors or M12 industrial types
- Lippert, Carefree, or equivalent OEM-spec brackets
- Marine-grade split loom for cable protection
- EPDM or TPO-compatible sealants for roof type
How Long Does This Take and When Can We Do It
A single camera mount on sound roof takes 60 - 90 minutes. Multi-camera setups or roof repairs add 1.5 - 2 hours. We respond in 2 - 4 hours in our our covered metros core service areas (Tampa - Ocala, Boise - Nampa corridor).
Outside those zones, our nationwide RVIA and RVDA certified partner network handles it - we coordinate the work and you get the same 90-day warranty. Timing depends on whether we're repairing fiberglass.
A straightforward bolt-down with sealant is quick. If the roof has soft spots, we have to cure epoxy or backing-plate adhesive, which adds 30 - 60 minutes of wait time (we don't rush that - it's your roof). Most jobs are done same-day or next-morning in-house call scheduling.
A Keystone Cougar owner in Jacksonville called on a Tuesday afternoon with a loose rear camera bracket - water was dripping inside the bay. We scheduled him for Wednesday morning.
Our tech arrived at 8:30 a.m., found minor softening around the fasteners, installed a backing plate, re-fastened with stainless hardware, sealed with Dicor, and was done by 10 a.m. Total labor was 90 minutes.
We tested the camera signal, and he was back on the road by lunch. That's the speed you get when the rig is the only thing between you and your trip.
Timeline expectations:
- Single camera mount on sound roof: 60-90 minutes labor
- Multi-camera setup or minor roof repair: 2-2.5 hours
- Major roof damage requiring epoxy cure: 2.5-3 hours plus wait time
- Response time in core areas (FL/ID): 2-4 hours from call
- Partner network response: varies by location, same warranty
- Sealant cure time before travel: 24 hours recommended
What Your 90-Day Warranty Actually Covers
We guarantee that the bracket stays mounted, the seal stays dry, and the cable doesn't short for 90 days from installation. This covers fastener failure, sealant breakdown, and workmanship defects. If water gets in at the penetration because we didn't seal it right, we come back and fix it at no charge.
If the bracket itself cracks or the cable develops a short at the connector we installed, we replace it. What we don't cover: damage from towing accidents, exterior bracket strikes, or aftermarket cameras you install yourself on our mounts (we can't spec for components we didn't install).
We also don't warranty against normal UV fading of the bracket or cable outer jacket - that's cosmetic. Warranty is transferable if you sell the RV, so the next owner gets the same protection.
A Thor Outlaw owner in central Florida had us install a side-view camera mount in July. By September, there was a tiny gap opening between the bracket and the fiberglass at one fastener - heat expansion was stressing the seal.
We came back, removed the bracket, re-sealed it with fresh Dicor, and re-fastened at no charge because it was within 90 days and our workmanship was the issue. The bracket has been solid for 18 months since. That's what the warranty is for - catching our mistakes before they become your roof leaks.
Warranty coverage:
- Bracket mounting integrity for 90 days from installation
- Sealant penetration (no water ingress at fastener holes)
- Workmanship on cable routing and interior connector
- Fastener corrosion or failure due to our fastener selection
- Transferable to next owner if RV is sold
- Does NOT cover exterior impact damage or aftermarket camera defects